Wednesday, June 26, 2013

Why Order Takeout, When You Can Make It At Home In Under 15 Min!

As luck would have it, I have unintentionally neglected my blog.  My life gets a bit turned around when Chris is back home as spending time with one another is crucial since we never know where the next job will take him and for how long.  THEN there's that God-awful incident from which I am STILL recovering from, the dreaded flu.  It will have been 2 weeks this Friday; thankfully, I am 99% better but still have lingering issues with my voice and a very light, occasional productive cough.  

I do have another recipe to post that I made a few weeks ago, just before I fell ill, that I will try to post up by this weekend.  Blog, I am sorry for my neglect; please forgive me! LOL

OMG, let me tell all of you that for the first time since I have lived on my own (nearly 15 yrs now), I have NEVER EVER not had chicken or seafood in my freezer.  For those who know me well, I am not, nor have I EVER been a really big beef eater.  That day has now arrived:  our freezer is completely overloaded with C-O-W!  Seriously. I can't believe I have no chicken, seafood, lamb or pork in there at all.  How did this happen?  I know how:  we got a really fantastic deal on what the guy liked to refer to as "cow in a box".  In this box, we got 8-10 Kansas City Strip steaks, 8-10 ribeyes, 18 hamburger steaks (patties) and 8 peppered beef tenderloins.  We bought this a few months ago because the meat is good for up to a year; and as evidenced by this email, we still have tons left!  Surprisingly the meat has turned out to be very tender and juicy so we have yet to be disappointed.

Chris commented the other day that he was "steaked out" which is funny because I made ribeyes for us over a week ago.  Yesterday I asked him to stop by the store and pick up some chicken or fish, and he came home with catfish fillets which I seasoned up really nicely, broiled and served with a salad.  I told him last night that today we WERE having beef, lol.  I researched and researched different recipes for ideas on how to prepare the Kansas City Strip Steaks that I had moved to the fridge last night.  I wanted to cook them differently and not as an actual steak (I think the chefs on Chopped would call it re purposing  lol.)  After reading through dozens and dozens of recipes, I concocted the following:

Sesame-Ginger Strip Steak

1/3 cup rice vinegar
3 Tbs sodium soy sauce
1 Tbs hoisin sauce
2 tsp cornstarch
1 1/2 tsp dark brown sugar
2 tsp grated peeled fresh ginger
3 garlic cloves, minced
2 tsp dark sesame oil, divided
2 Kansas City Strip Steaks, trimmed of fat and sliced against the grain
1 1/2 cups shredded carrot
1 onion, quartered & sliced
1/2 cup fresh bean sprouts
8 oz uncooked wide rice stick noodles (banh pho)
1/2 cup chopped green onions
1 Tbs sesame seeds, toasted


Soak your rice noodle sticks in warm water for about 45-60 min.


Combine the first 8 ingredients, whisking until sugar dissolves.


Heat a wok or large nonstick skillet over medium-high heat. Add 1 teaspoon sesame oil to pan. Add half of steak; sauté 4 minutes or until browned.


Remove steak from pan. Repeat procedure with remaining oil and steak. Add vinegar mixture, carrot, onion, and sprouts to pan; cook for about 5 minutes, stirring frequently (this resulted in nice crispy veggies; you may want to stir fry longer if you want your veggies less crispy). Return steak to pan. Add noodles; cook 3-4 minute, stirring constantly. Sprinkle with green onions and sesame seeds.


If your eyes are sharp, you will notice there are no sesame seeds in the dish; I did not realize I was out of sesame seeds so my plan did not work out completely.   I can see how my plan for the toasted seeds would add a nice texture and flavor profile to this dish.  

Suggestions:  I would say that sugar snap peas, red or yellow bell peppers and broccoli (for you enthusiasts, lol) would also be a great addition to this dish; personally, I used what I had here at home.  As far as the noodles are concerned, I can suggest using regular rice noodles if that is all you can find; I used these because it's what I had in the pantry.  If you don't have an Asian market in your area, look in the international aisle of your grocery store for these noodles.

Dinner was a success!  Chris agrees that this dish beats take out for sure (makes me very happy)  Hope you give it a try and that you like it as much as we did.

Until next time, Happy Eating!!

Sunday, May 5, 2013

Cravin' Raisins?

Happy Cinco de May to everyone!  Today I am at home working on an order for a Cinnamon Raisin Bread that I make; since I haven't blogged in a while, I decided to blog about the bread.  As it turns out, it has been suggested I start catering on a part-time basis; will it happen?  I still haven't decided on it; I will, however, entertain the idea of selling dishes or breads or desserts to those who ask such is the case today.

I have found that making bread can be very therapeutic for me; I must stress that fact that I do not utilize nor own a bread maker.  I prefer using my wonderful KitchenAid Stand Mixer that I absolutely love; AND if I am having a rather stressful day, I will knead my dough by hand, lol.


My set up:


When creating this recipe, I was taken back to a convenience store I worked at on the weekends my senior year in high school; we used to make this enormous cinnamon rolls that were super yummy.  I wanted that warm, inviting feeling and taste in my bread so I decided to add nutmeg to it as well.  You will notice in the picture next to the nutmeg jar is a bag of what looks like nuts; these, in fact, are whole nutmeg.  You can certainly use ground nutmeg, but I personally prefer using whole nutmeg for a much better profile.  Also if you do not buy the packets of yeast, you can buy the jar as I have; I find it more handy to have, and it lasts 6 mos.

Now there are a few things to keep in mind when baking yeast breads: you need active yeast in order for the rise to occur and you need heat but not direct heat.  In order to create the heat the yeast needs to work:

1.  you can place your bowl and pan on top of the heated oven
2.  you can put in a warmed oven around 200 degrees
3.  you can place covered on your patio or balcony in the sunlight
4.  you can place covered in the trunk of your vehicle if in direct sun (lol)
5.  if you're lucky to have a proofer in your home or apt, great!
6.  you can place covered in your laundry room if it is small & enclosed with 
      dryer running


Now, I have found the last one to be our case; we have a nice, enclosed laundry room in our loft.  When the dryer is running on high and the door closed, it creates the perfect heat need for my breads to rise.  It even makes my sourdough started ferment perfectly when I do sourdough breads.

So, now let's get started!


Ingredients:

3/4 cup raisins

3/4 cup milk
1/3 cup packed brown sugar
1 pkt or 2-1/4 tsp active dry yeast
4-1/4 cup bread flour
1 tsp salt
1-1/4 tsp ground cinnamon
1/4 tsp ground nutmeg
2 eggs
2 Tbs butter, melted & cooled
Cooking spray
1/2 cup granulated sugar
1 large egg white, lightly beaten

Preparation:

Place raisins in a small bowl & cover with very hot tap water.  Let stand 10 min; drain well.

Heat milk over low heat in a small saucepan to between 100-110 degrees & remove from heat.  (to proof yeast, mix yeast well with milk & add 1 tsp sugar). Place on a warm stove top & let sit for 10 min.  If yeast is active, it should be frothy & doubled in size.


Combine 4 cup flour, salt, nutmeg & 1/4 tsp cinnamon in electric mixer bowl.


Add eggs, brown sugar & 1 Tbs butter to milk mixture; stir well with a whisk until combined.  


Add to flour mixture


Mix with paddle until soft dough forms.  


Switch paddle to dough hook & knead on speed 2 until smooth and elastic (about 8 min); add enough of remaining flour, 1 Tbs at a time, to prevent dough from sticking.  


Lightly coat dough with cooking spray; cover & let stand 10 min. 


Knead in raisins.


Place dough in a large bowl coated with cooking spray, turning to coat top.  


Cover & let rise in a warm place free from drafts, 1 hr or until doubled in size.  


(Gently press 2 fingers into dough; if indentation remains, dough has risen enough.) 


Punch dough down; cover & let rest 5 min.


Spray 9x5 loaf pan with cooking spray.

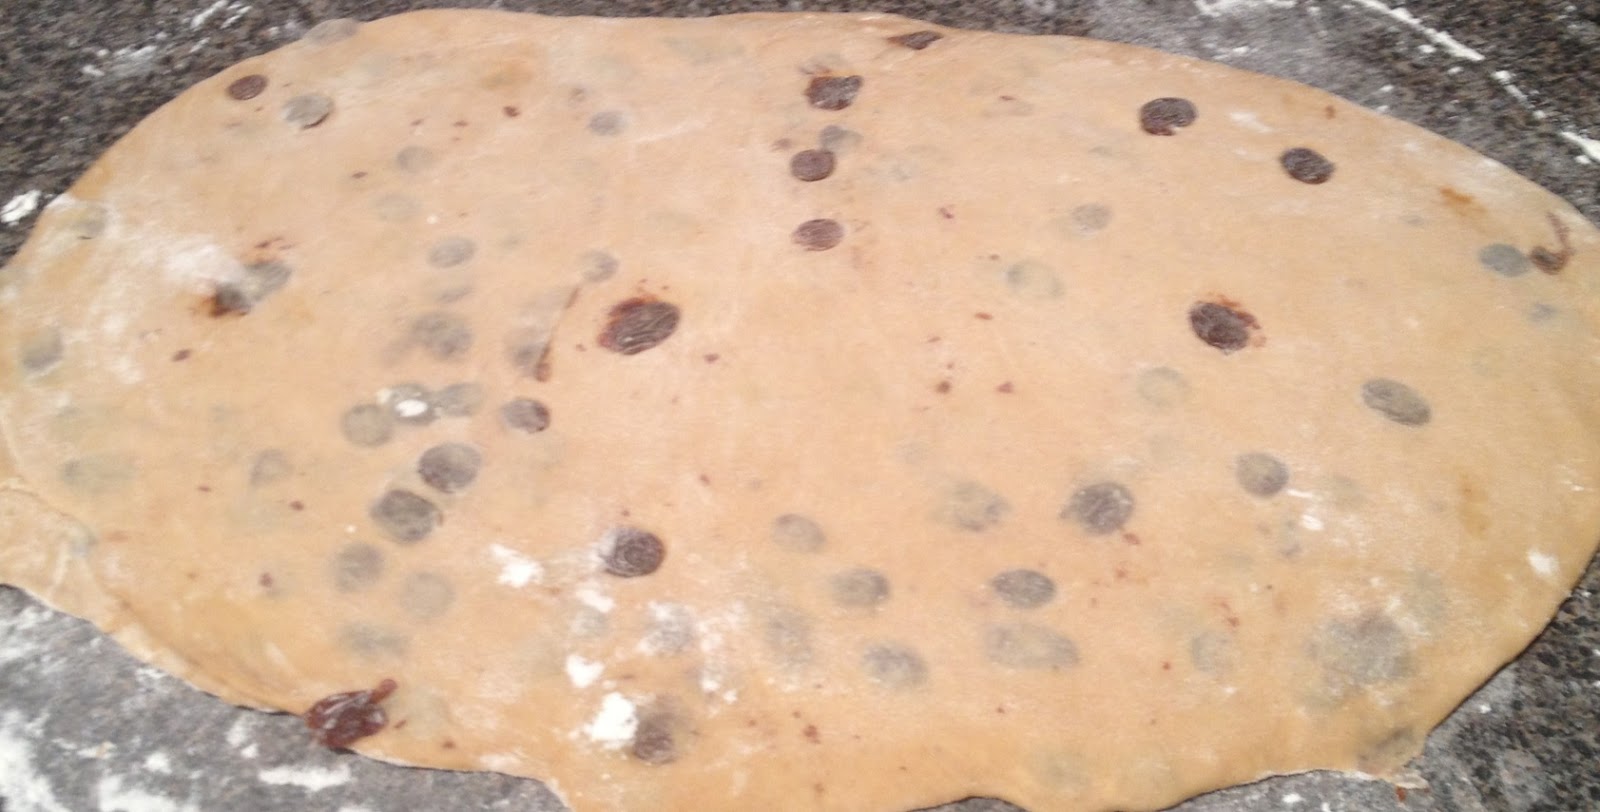
Roll dough into a 14x7 rectangle on a lightly floured surface; lightly coat surface of dough with cooking spray.  


Combine 1/4 cup sugar and 1 tsp cinnamon in a small bowl.  Sprinkle sugar mixture evenly over dough; lightly re-coat with cooking spray.  


Cover dough with plastic wrap; press to help sugar mixture adhere.  Remove & discard plastic wrap.  


Roll up rectangle tightly, starting with short edge, pressing firmly to eliminate any air pockets; pinch seam & ends to seal.  


Place roll, seam side down, into prepared pan.  


Cover & let rise 40 min or until doubled in size.

Preheat oven to 350 degrees.

Uncover loaf; carefully remove exposed raisins & gently brush dough with egg white.  


Bake at 350 degrees for 50 min or until loaf is browned on top & sounds hollow when tapped.  Remove from pan; brush with remaining 1 Tbs butter & cool on wire rack.


Top view

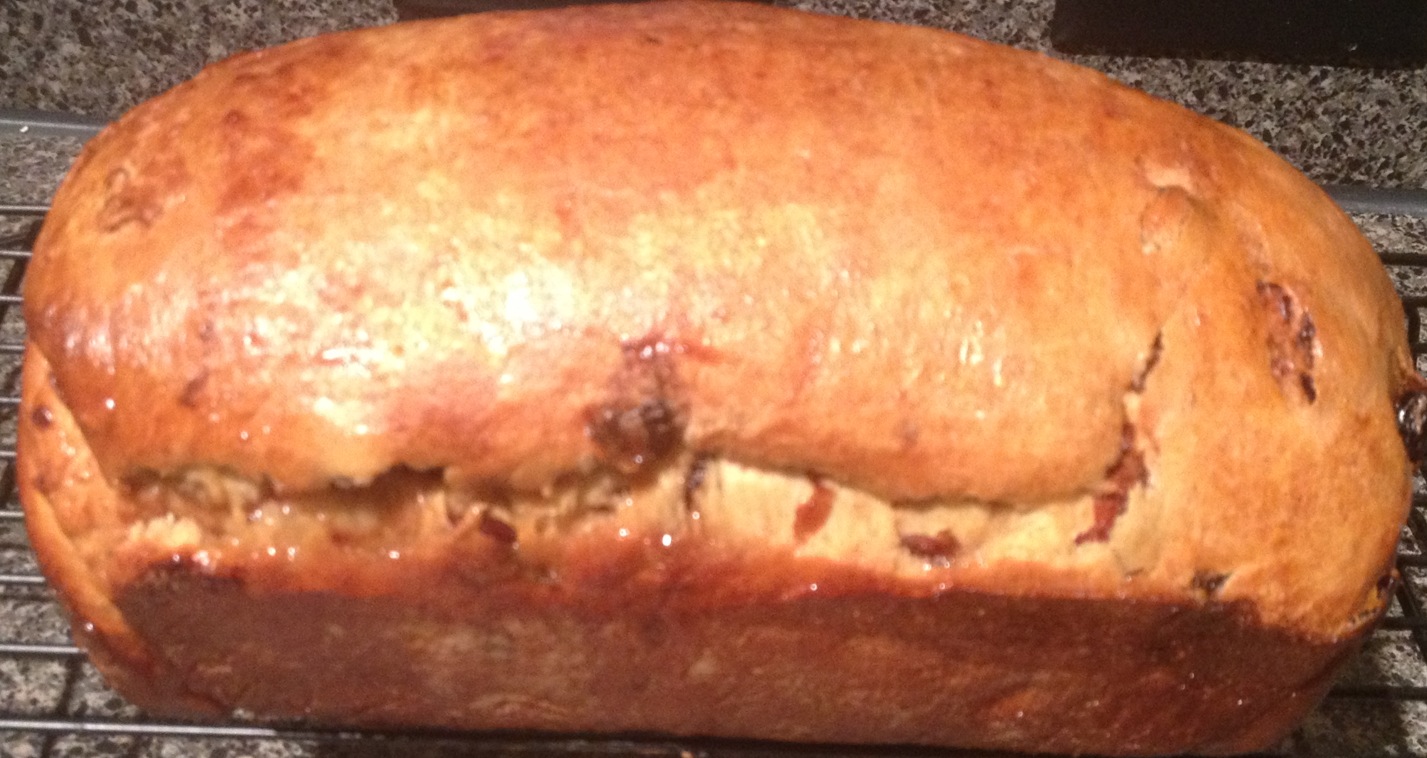
Side view, nice & tall

 Out of pan, cooling on rack

Wow, the loft smells incredible AMAZING!  Makes ya' want to take a bite of the air, lol.  I hope you will give this a try or even hit me up if ya like one; I have plenty of time on the weekends for all kinds of projects.

Until next time people, Happy Eating!

Sunday, April 14, 2013

ALLA CARBONARA

Ah, Spaghetti alla Carbonara, now that is music to my ears.  I have tried Carbonara, at my own risk, at different eating establishments and had NEVER found it to be spectacular or really any good until Chris took me to Coppa Ristorante.  I was incredibly amazed beyond belief that I had finally found a restaurant that not only made carbonara but made it VERY well!  Coppa, however, uses a salami toscano as opposed to pancetta which a great compliment to the dish as well.

Apparently Carbonara is a dish specific to Rome based on eggs, cheese, bacon (either pancetta or guinciale) and black pepper.  Normally spaghetti is used but you can use linguini, fettuccine, bucatini (which would be great for this dish as the pasta has a tiny hollow middle in which the sauce can soak into) or cappellini (which is my fave because it is light, plus it holds up well to the sauce without falling apart). 

Below is my recipe for Carbonara portioned for 2 people; you may double it for 4 and so on and so forth. 

Ingredients:

8 oz. cappellini (angel hair) pasta
1/2 Tbs olive oil
4 oz rindless pancetta, chopped
2 egg yolks
2-1/2 Tbs heavy cream
4 Tbs freshly grated Parmesan Cheese
Salt & Pepper

Preparation:

Bring a large, heavy-bottom, pot of lightly salted water to a boil. Add the pasta & return to boil according to pkg (4-5 min for angel hair).


Because I live so close to Phoenicia Specialty Foods, I can readily go over and ask for 1/4 lb of pancetta sliced #1 (which is approx 1 oz slices).  You can get pancetta at HEB or Central Market deli departments as well.  Pancetta is a pork belly meat that is cured in salt and contains peppercorns; however, there are several variations available. (as you can see, today, mine had no peppercorns)


Heat oil in a heavy-bottom skillet; add the chopped pancetta and cook over medium heat.  Stir frequently for about 8-10 min until nice and crispy and golden brown.


Beat the egg yolks with the cream in a small bowl and season with salt and fresh cracked pepper. (if you read or have read recipes about using the entire egg, beware as the egg will curdle, and you will not have a smooth, creamy textured sauce as you would using only the yolks)


Drain your pasta and return to the pain.  Tip the contents of the skillet, then add the egg mixture and half of your Parmesan Cheese.


Stir well, then transfer to a warmed serving dish and serve immediately, sprinkled with remaining Parmesan Cheese.


Beautiful and luscious.  You may top with fresh-cracked pepper as well which is how I like mine.

Hopefully you'll be inspired to try this dish out as well and hope that you will find it both satisfying and sinfully delish!

Until next time, Buon Appetito or Happy Eating!

Sunday, April 7, 2013

Raspberry-Filled Lemon Cupcakes

Oh Sunday, funday, what to do??  First go to Eastie Boys to get the Creme Brulee French Toast & Chicken Poblano Sausage for breakfast AND Inversion Coffee House for my daily Steamy Meg.  

I had been reading over a book I had received from my good friend, Tammy, when I left the hospital, called Betty Crocker Best Cupcakes & Cakes.  I was getting all sorts of ideas running through my head yesterday; even Priscilla was drooling over a recipe for Tie-Dye cupcakes when she was over visiting last night.  

So today I decided to make some cupcakes & take them to work.  I will share the original recipe first then my version.

Raspberry-Filled Lemon Cupcakes

Cupcakes:
1 box Betty Crocker SuperMoist French Vanilla cake mix
Water, vegetable oil & eggs called for on the box
2 Tbs grated lemon peel (2 medium lemons)

Filling & Frosting:
1 container (6oz) fresh raspberries (1 - 1-1/4 cups)
2 containers (12 oz each) Betty Crocker Whipped Fluffy White frosting
2 Tbs grated lemon peel (2 medium lemons)
1 Tbs fresh lemon juice
Grated lemon peel strips

Preparation:

1.  Heat oven to 350 degrees (325 for dark or nonstick pans).  Place paper baking cups in each of the 24 regular-size muffin cups.  Make and bake cake mix as directed on the box for cupcakes, using water, oil & eggs and adding 2 Tbs lemon peel.  Cool 10 min.  Remove to cooling racks.  Cool completely.

2.  Reserve 24 raspberries for garnish, set aside.  In a small bowl, beat remaining raspberries, 1 cup of frosting and 2 Tbs lemon peel with a whisk until well blended.  Fit 1/4" diameter round tip into decorating bag.  Spoon raspberry mixture into bag.  Insert tip into center of each cupcake, about 2/3 of the way down; gently squeeze bag, pulling upwards until cupcake swells slightly and filling comes to top.  (Do not let filling spill out over the top of cupcake.)

3.  In a small bowl, mix remaining frosting & the lemon juice until smooth & shiny.  Pipe or spread frosting onto cupcakes.  Garnish each with fresh raspberry and lemon peel strips.

My Version:

Cupcakes:
1 box Duncan Hines Lemon Supreme cake mix
1 box Jell-O Sugar Free Instant Lemon Pudding mix
1-1/3 cup milk
1/3 cup extra virgin olive oil
3 eggs
1 tsp vanilla

Filling & Frosting:
1 container (6oz) fresh raspberries (1 - 1-1/4 cups)
2 containers Duncan Hines Classic White frosting
2 Tbs grated lemon peel (2 medium lemons)
1 Tbs fresh lemon juice

Preparation:
1.  Heat oven to 350 degrees.  Place paper baking cups in each of the 24 regular-size muffin cups. (if you only have a 12-cup like I do, cover your bowl and refrigerate until you're ready to do the next batch.)  Make and bake cake mix as directed on the box for cupcakes, using milk, oil, pudding mix, vanilla & eggs.  Cool 10 min.  Remove to cooling racks.  Cool completely.


2.  Reserve 24 raspberries for garnish, set aside. 


In a small bowl, beat remaining raspberries, 1 cup of frosting, 2 Tbs lemon peel (my lemons were small so I needed 3) and lemon juice with a whisk until well blended.  Fit 1/4" diameter round tip into decorating bag. 


Spoon raspberry mixture into bag.  Insert tip into center of each cupcake, about 2/3 of the way down; gently squeeze bag, pulling upwards until cupcake swells slightly and filling comes to top.  (If some of the filling spills out, remove with a spatula.)


3.  Fit a star shaped tip into a decorating bag and fill with frosting (I did nothing to the frosting except beat it a bit).  Starting from outside edge of cupcake and working towards center in a circular motion, pipe icing onto cupcake.  Top with a raspberry.


Now I opted for the Lemon Supreme mix because I did not readily locate the French Vanilla; since I was already going for a lemon-based mix, I decided to change some things with the filling and icing.  Stephanie, in our leasing office here at the lofts, said it reminded her of Fruit Loops but in a much better way; she said she loved it.  I decided to try one out also and was pleased with the results and the flavors.  Now, the box says it makes 24, I only came out with 21; I used an ice cream scoop to measure so maybe this is what happened.  

Here's a tip:  if you, like me, do not fill all cupcake slots and are left with some empty cups, fill those spots with water about 2/3 of the way up; this will ensure each of your cupcakes bakes evenly and perfectly.

Hope you enjoy this recipe, whether it be the original or my version.  I am sure they will be at hit at your home or office as well.  Now time for me to put a lid on them for tomorrow.

Until next time, Happy Eating!

Wednesday, March 27, 2013

Blueberry Lemon Tart

To start off tonight, let me inform you that I am the Business Office Manager for two VERY busy urologists in the Medical Center.  As it turns out, tomorrow is Dr. Guerriero's 75th bday, and he apparently loves the flavor profile of lemon and blueberry together; I made this special tart for him for Christmas and was told it was a total hit!  So I had a grand idea to make his favorite dessert for his birthday and ease our way into a nice 3-day weekend.  

Let me point out the originator of the fabulous dessert, Tyler Florence!  I must, once again, brag about meeting him and having him chat with me a few minutes to answer questions, talk about food and sign his new book Fresh for me.


This tart is light, refreshing and is an elegant dessert.  It is sure to please any crowd and be the talk of any gathering.  If you're on Twitter, be sure to follow Tyler Florence for all the  latest and greatest on him, his food, his restaurant; if it weren't for this, I would've never known he was coming to Houston.  The following recipe is in its true form; I dare not deviate from the master's plan!

Blueberry Lemon Tart

Ingredients

Pastry:

1 1/2 cups all-purpose flour
2 tablespoons sugar
Pinch kosher salt
1/2 cup (1 stick) unsalted butter, cold, in chunks
1 large egg, separated
2 tablespoons ice water, plus 1 teaspoon

Filling:

4 large eggs
1 1/2 cups sugar
1 cup fresh lemon juice (about 5 lemons)
1/4 cup heavy cream
1 lemon, zested
Pinch kosher salt
1 pint blueberries


No need to spend money on fancy pie weights when you can use regular dry beans.  The recipe does call for 1 cup of fresh lemon juice & suggests it would be 5; but in actuality, I normally need 8 lemons to get an entire cup of  juice.


Tart pan with removable bottom


Directions

To make the pastry, pulse the flour, sugar & salt together in a food processor. 


Add the butter and pulse until the dough resembles cornmeal.  


Add the egg yolk & 2 Tbs ice water & pulse again until the dough pulls together.


Wrap the dough in plastic wrap and let it rest in the refrigerator for 30 minutes.


Roll the dough out on a lightly floured surface into a 12-inch circle. Roll the dough up onto the pin and lay it inside a 10-inch tart pan with a removable bottom. Press the dough into the edges of the pan and fold the excess dough inside to reinforce the rim.  Cover the tart pan with plastic wrap and put it into the refrigerator for another 30 minutes to rest.

To bake the shell, heat the oven to 350 degrees F.

Put the tart pan on a baking sheet & prick the bottom of the dough with a fork. 


Cover shell with a piece of parchment paper & fill with pie weights or dry beans. 


Bake for 25 min. Remove parchment & weights. Lightly beat the egg white with 1 tsp water & brush it onto the bottom & sides of the tart shell; set aside to cool.

(in the meantime, zest one lemon & juice your lemons)


Whisk together the eggs, sugar, lemon juice, cream, zest, and salt. Add the blueberries to the cooled tart shell and pour the filling over the blueberries. 


Bake for 20 to 25 minutes. The curd should jiggle slightly when done. Cool to room temperature, remove from the tart ring, and serve.


The Masterpiece

Unmolded, side-view


So it's all done & ready; I have to let it cool completely before I put the lid on my carrier.  I want to thank Tyler Florence for being the most awesome chef on the plant and for this most incredible dessert and also a special thanks to the Food Network for saving me when I can't get to my cookbooks, lol!

I really hope that you are able to give this tart a try.  Let me tell you that I have, in the past, bought pre-made pie dought; however, this homemade crust holds up SO much better to the filling plus it tastes fantastic!  

I just might have to work on one of Tyler's recipes from his newest cookbook, Fresh.

Until next time, Happy Eating!!


The b-day boy ready for this tart!